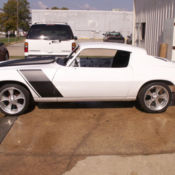
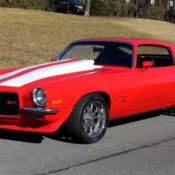
1971 Chevrolet Camaro Pro Touring Project Car
Technical specifications of Chevrolet Camaro 1971
| Price: | - |
|---|---|
| Condition: | Used |
| Item location: | Anna, Illinois, United States |
| Make: | Chevrolet |
| Model: | Camaro |
| Type: | Coupe |
| Year: | 1971 |
| Mileage: | 0 |
| VIN: | 124871N587416 |
| Color: | Yellow |
| Drive type: | RWD |
| Vehicle Title: | Clear |
| You are interested? | Contact the seller! |
Description
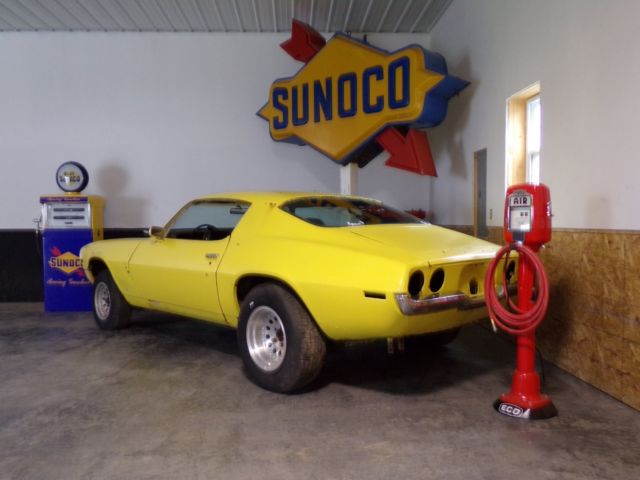
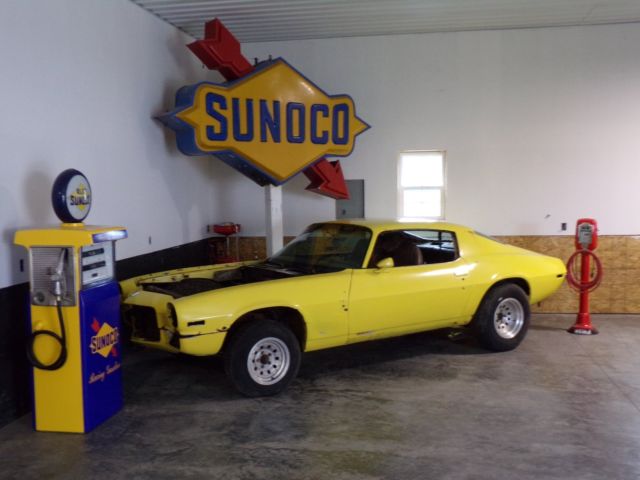
1971 Chevrolet Camaro Pro Touring Project Car
This is a NO RESERVE Auction
Please read this item description thoroughly before bidding on this car
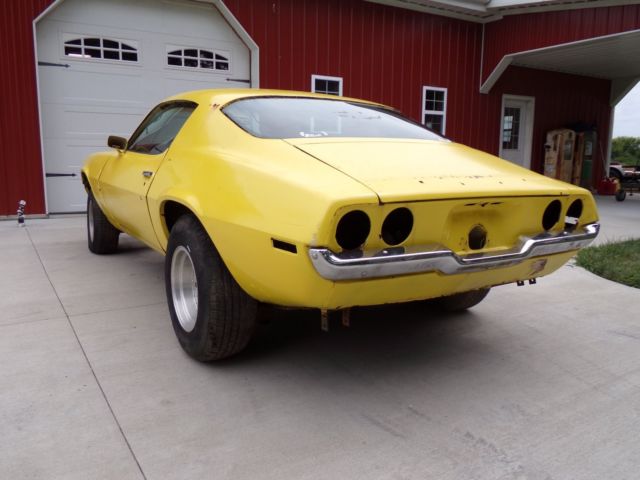
For sale is a 1971 Chevrolet Camaro. These early 1970 to 1973 2nd generation Camaros have become one of the most popular classic muscle cars in the Pro Touring movement of today. Early 2nd generation Camaros are nearly impossible to find these days and when you do come across an original condition car, they areusually all in the same typical rusted out condition requiring significant external sheet metal and body restoration. If you come across a super nice car with beautiful shiny paint and a killer engine, it just means that someone else has already replaced most all of the external sheet metal (hopefully) on the car and built it into a nice car. These early 70' to 73' F body cars are approaching a half century in age and GM never intended for these cars to ever last as they were mass manufactured and assembled very poorlyfrom day one on the assembly line.The majority of these survivor cars have significant rust issues, regardless of the geography and the climate in which these cars lived their life, even the "California" cars will have some rust issues. That being said, these cars are still just awesome in their appearance and styling and that is the one thing GM did do very well!
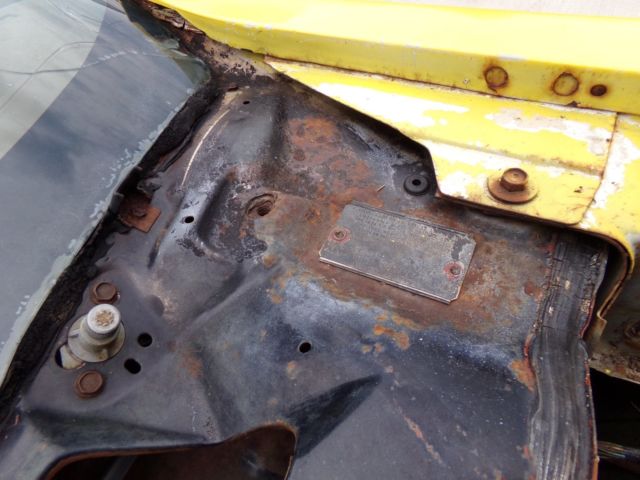
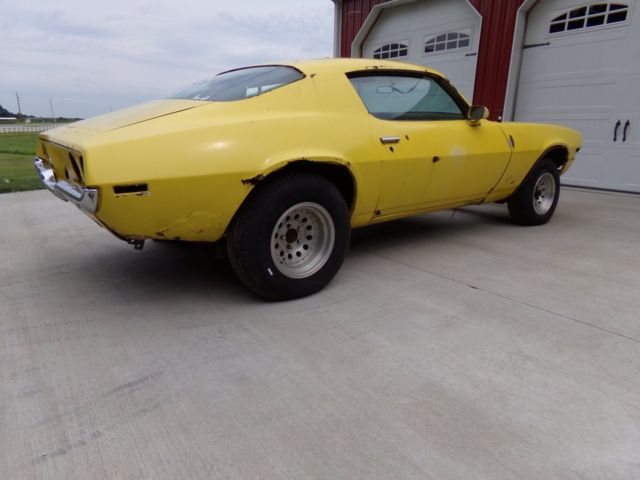
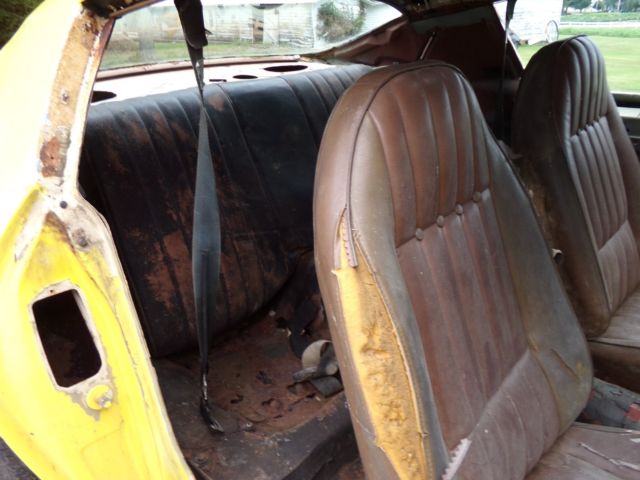
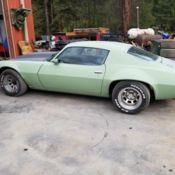
The car I have for sale isthe perfect platformto build into a killer Pro-Touring super/muscle car. This car comes with a clean Illinois title in my name along with its original VIN tag and body trim tagthe carwas born with on the GM assembly line. This car started its life out as a basic vinyl top Camaro that was originally white in color. It has a 10 bolt rear end which is trashed because the rear differential cover is missing. My guess, is that this car was probably a factory 307 V8 car and it originally had an automatic transmission. This car is being sold as a roller. This just means there are less antiquated original parts for you to have to drag off to the scrap yard that you would not be using anyway again, making this a greatcarfor a Pro-Touring/resto-mod build process.
Like almost all early 2nd generation survivor Camaros, this car will require the usual amount of sheet metal fabrication and body restoration. As you read this description you will realize that a significant amount of exterior body panelswill requireworkorreplacement. This is very common place with these cars. If you arefamiliar with these cars at all, then you are not surprised at what I am saying. The one benefit in having to replace so much external sheet metal on these cars is that it allows a guy the opportunity to "hand craft" his car. You will be able to build your car with a level of fit and finish that GM never imagined when the car was on the assembly line being "slapped" together almost 50 years ago. I find this to be extremely satisfying and you will too as you begin a project such as this. You will also have the satisfaction and piece of mind knowing that once you complete the sheet metal and body restoration process,you will then know definitively that you do in fact have a clean, 100% rust free car not only externally, butinternally as well.
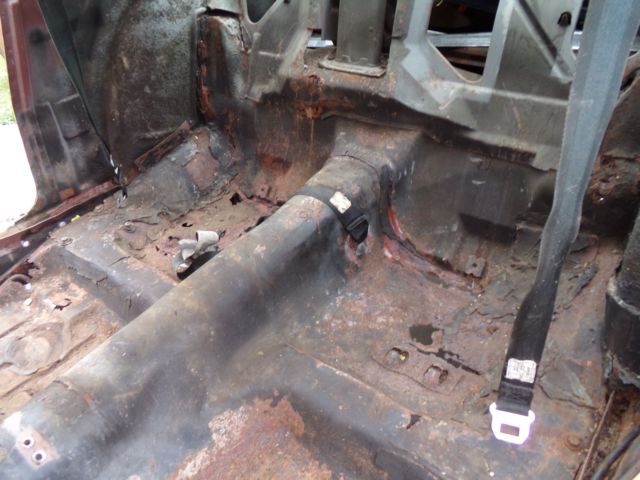
When it comes to a survivor 2nd generation F Body car, there absolutely is no such thing as a "rust free car"especially if it is wearing any of its original sheet metal. I would be scared to death to spend $5,000 to $10,000 on a "rust free" car wearing its original quarter panels and then spending another $10,000 to $20,000 on paint and body work that would then beapplied and anchored to this original "rust free" sheet metal. Especially not having any ideaor real visibility on what thelower internal trunk drop downs look like as well as the backside condition of what the original "rust free" quarter panel sheet metallooked like. These cars rusted from the inside out as well as from the underside in.The good news here is that most of the inner structure of this car seems to be clean andsolid and thatis what ismost important. I am referring to the firewall /cowl panel structure, rear package tray, rear seat back partition panel, lower deck/trunk hinge mounting panel as well as the inner rear quarter panel structures.
Cowl Panel / Firewall
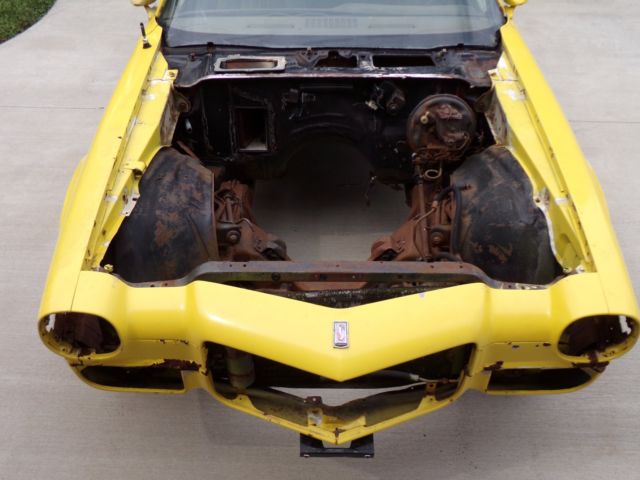
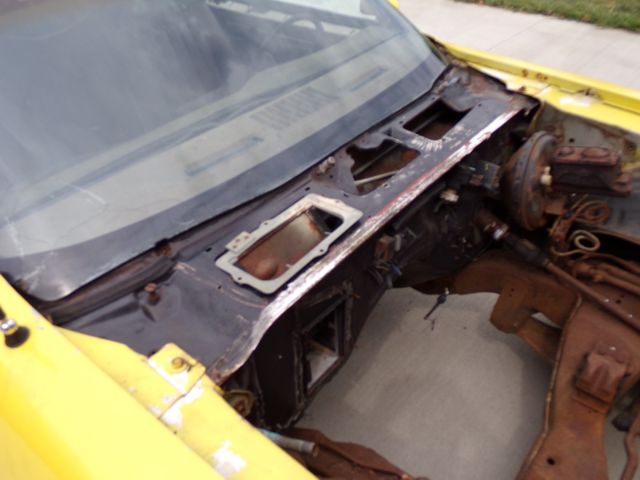
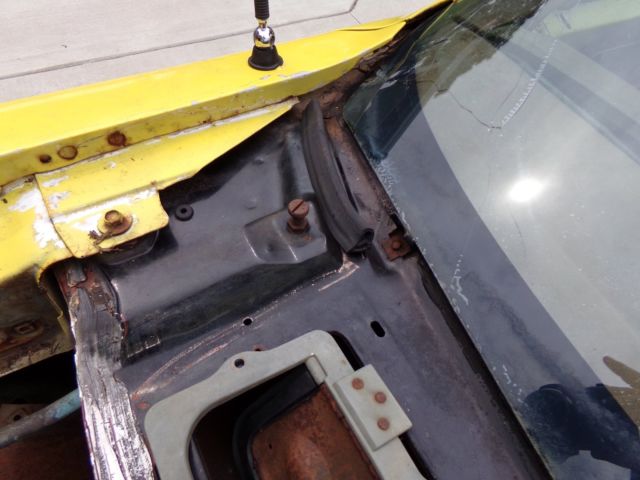
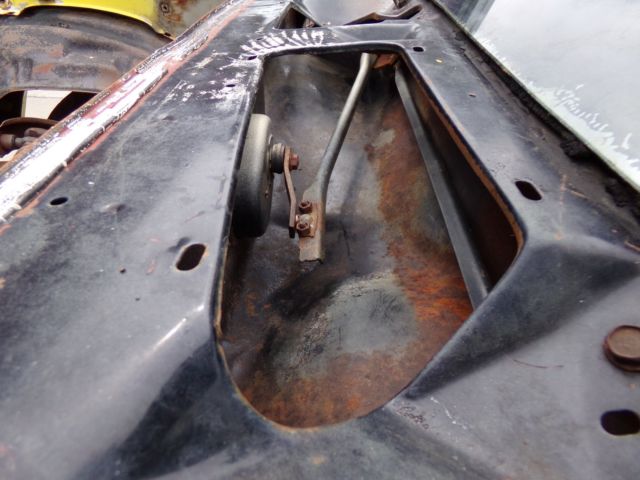
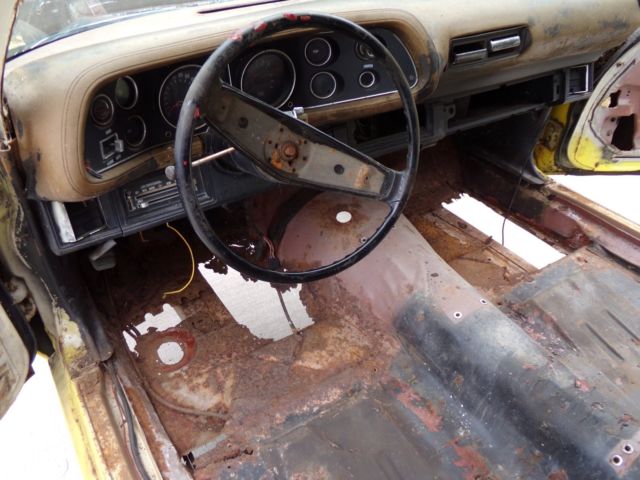
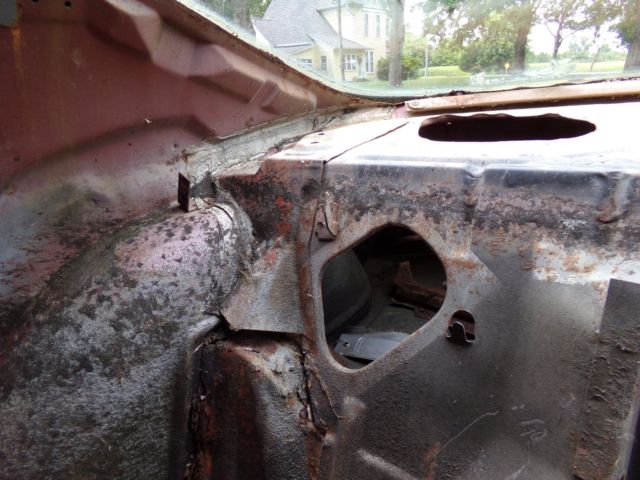
Surprisingly, the cowl panel and the lower cowl panel are in very nice shape which is highly unusual with these cars.Of allthese cars that I have ever laid my eyes on, almost all of them seem to have suffered this usual and significant rust in the lower right and left hand corners of the front windshield where the windshield seal begins to fail and leak. Over time, water and dirt begins to collect and rust eats right through the corners of the upper cowl panel under the windshield as well as rusting straight through to the windshield pillar metal structure beneath the corners of the cowl panel. The firewall is also in nice shape as well with the exception of the front tow boards. Now that Classic Industries (OER) has this new front toe board sheet metal stamping available, I do not believe it will be at all necessary to replace the entire fire wallin order to rectify this part of the main body structure.
Cabin Floor / Trunk Floor
If I were building this car, I would go about building this car in the exact same manner I built my Pro-Touring 1970 Camaro. On my 1970 Camaro build, the entire underneath side of the car was basically shot as almost all of them are.I did not want to mess aroundwasting valuable time trying to perform patchwork and trying to dissect and remove rusty, rotten sheet metal away from what I believed to be questionable rear frame rails anyway. I found it much easier (and cheaper in the long run) to just order entire new floor foundations. Keep in mind, these are unibody cars. If the cabin floors and trunk floor arecompromised from rust, you can count on the entire remaining bottom end of these cars also being compromised in most cases. With this car, you will need to replace the floor, the rear seat lower panel, trunk floor and frame rails.This can be accomplished very easily. Classic Industries, Dynacorn and AMD all sell the sheet metal necessary to restore this foundation. All you will need is simply two panel assemblies and you can rectify the entire bottom end platform of this car and you will be glad you did. You will have a very nice, super clean,solid foundation that you know you can beat on if you ever plan to autocross race your car. You can purchase a complete floor assembly with all original factory bracing with one part number. You can also buy a complete trunk floor assembly that includes the rear seat lower panel, trunk floorand frame rails all in one complete unit. These two assemblies mate together and are awesome. They can save you a ton of time and money since all the components come fully welded together to form a complete unit. It makes installation and fitment much easier. It is also my understanding that these new rear frame rails are produced from heavier gauge steel vs the factory GM frame rails which is very important especially if you plan to weld in a Detroit Speed Quadra Link rear suspension set-up into the rear frame rails of any early 2nd generation F body car.
Inner Quarter Panel Structure/Seat Back Partition Panel/Package Shelf/Lower Deck Truck Hinge Panel
The rear internal quarter panel structures of this carappear to benice and solid on both sides of the car. I did not pay real close attention to the condition of the inner wheel wells. If you are planning on building a Pro-Touring car, it does not matter because you are going to cut these inner wheel wells out anyway to weld in some Detroit Speed mini tubs to accommodate a very wide 335 series rear tire. On my 1970 Camaro, I ran concaved Forgelinerear wheels (18" X 12") with a huge wheel lip on a narrowed Ford 9" rear end with a BF Goodrich KDW 335/35/ZR18 tire.The rear package shelf panel that sits under the rear window also seems to be in nice shape and is solid. The package shelf extension panels are also very clean. These typically are wasted from rust as a result of the rear window developing leaks over time much like the cowl panel under the front windshield. The lower deck filler panel also seems to be in nice shape on this car. This is the panel that the rear trunk lid hinges are mounted to. I have provided detailed photos to help represent what all these rear structures look like. Please note that the rear trunk lid on this car in my opinion is not worth saving. I have a super nice very cleanOE, GM deck lid that I was able to rescue from a wrecked 1979 Camaro that will be provided with this car to the winning bidder. I have provided pictures of this very nice trunk lid. You will see from the pictures that the pinch welds and the inner structure is beautiful on this panel.
Outer Quarter Panels / Trunk Drop Downs / Outer Wheel Houses
If you can even find an early 1970 to 1973 2nd generation Camaro in original condition that can actually be purchased, you might as well plan on replacing the entire rear clip sheet metal on the car. If the car has any holes in the floor boards, (and they all do) or if you open the trunk lid and there are holes in the trunk floor, without question the rest of the entire rear clip sheet metal is also going to be wasted. You will absolutely find yourself replacing the entire rear clip sheet metal panels to include both driver and passenger side outer quarter panels, outer wheel houses, trunk lower side panels and since you are there it only makes sense to replace the rear tail panel as cheap as they are. This car is no different and will require a new rear clip. The good news here again is that since you will be removing the rusted original rear quarter panels, this allows a guy the very important access to the internal rear quarter panel structures.These internal structures were almost bare metalduring the original GM assembly line process.These structures hardly saw any primer or paint to offer any real corrosion protection. You will have the opportunity toeither blast or wire wheel these panels clean to bare metal and then apply a good coating of epoxy primer/weld through primer as you"button" the car back up with new external quarter panels. You then can be assured that you now have a "rust free" rear clip on your car and suitable to apply your expensive body and paint work.
Doors
Finding a clean pair of original GM 2nd generation Camaro doors from 1970 through 1981 is something that I have just about given up on. Almost always, the doors are wasted on these cars. The doors on this car are questionable. They are complete with functioning window regulators and glass. Certainly, at a minimum, they might need to have new outer door skins installed. Before I would go to that trouble, I would at least attempt to try sourcing some decent doors from any 1970 through 1981 Camaro that might be clean and salvageable. Other than the exterior door handle size, these doors are basically the same and they will all work on this 1971 car. Of course, you can always buy new door shells from Classic Industries, Dynacorn or AMD but when it comes to hoods, front fenders, doors and trunk lids,it is always best to use OE, GM panels if at all possible for fitment reasons.
Front Clip
From the photos, you can see what you get. Hood hinges are provided with the car however they are not shown in the photos as well as a nice, full front non Rally Sport style factory bumper (I forget to photograph these items). You will need to source a hood. There are many hood options available for any 1970 to 1981 2nd generation Camaro. I personally prefer a stock OE style GM hood. It is not too difficult to find a nice clean OE GM hood for a 1970 to 1981 Camaro. Hoods were about the one and only panel on these cars that was not prone to damage from rust. This car is in fact wearing its original factory GM front fenders. Whoever buys this car, if you do not know how to tell OE, GM fenders from aftermarket units, I can show you the trick on how to immediately identify original OE fenders from aftermarket fenders when you pick up the car. Trying to locate a clean set of original GM front fenders for these cars is nearly impossible and they are very expensive when you do run across one. Before, I would get in a hurry to order new aftermarket front fenders, I would first strip these OE fenders to bare metal using a dual action sander to understand what level of fabrication would be necessary to save these fenders and use them. If it is determined that these fenders cannot be saved, I would order new front fenders from AMD (Auto Metal Direct). The inner wheel wells seem to be solid and could be re-used with minor repair from what I can tell. However, once they are blasted, this could be a different picture. These too can also be purchased new and they are cheap so trying to salvage the original units might not be cost effective.This car was not born as a true RS (Rally Sport split bumper) car however, a lot of guys like the RS spilt bumper look. If this is the case, then you can just buy the entire RS kit from Classic Industries OER and you are in business.
Roof
This car was originally a vinyl top car. Consequently, the roof was plagued and exposed to moisture and rust as almost all vinyl tops did from over 46 years ago. There are rust holes in the roof and this will need to be addressed. Fortunately, I have a donor car that has a very nice roof and roof structure. I have carefully, cut the roof and roof structure along with the windshield pillars and outer cowl assembly from this donor car. I will provide this valuable OE sheet metal with this car included in the price to the winning bidder. I have provided photos of this donor roof structure as well. This donor roof is super nice and very clean. The outer skin is perfect. You will also notice form the pictures that the front windshield mounting surface is super clean without a stitch of rust or even any pinholes from rust which is atypical of these old cars. This roof structure would be ideal to modify and fabricate in order to allow for a custom, flush mounted front windshield allowing you to ditch the old factory windshield trim for a killer, clean modern muscle car look. I decided to cut this roof to include the windshield pillars and the outer cowl structure to allow the winning bidder plenty of options in terms of repairing the roof to one'sspecific requirements.
Summary
Please feel free to check my eBay feedback as I have 100% perfect feedback. I have tried to represent this this car as accurately as possible. I absolutely love these early 70' to 73' 2nd generation F body cars and they all deserve to be saved because once they are gone, they are gone and GM is not making any more of these awesome cars. I believe these early 2nd generation cars could very well be one of the sexiest muscle cars that GM ever produced. When these cars are built into a modern day, pro-touringmachine with the right stance, the right big wheels / tires and big brakes, they absolutely look angry as hell and I love it!! If I was building this car, just as I did with my 1970 Camaro build process, I would remove the entire stock front sub frame suspension assembly and the entire rear suspension assembly. I would then load it all on a trailer and make one trip to the scrap metal yard and get rid of this antiquated junk. I would then order a complete Detroit Speed front and rear suspension package to also include a 9" Ford rear axle assembly with an LS engine platform, big brakes, Forgeline wheels and a Tremec 6 speed manual transmission.
General Terms
This car is located in Southern Illinois about 30 miles south of Marion, IL and right off of Illinois Interstate 57. This car can be picked up locally or it can also be picked up by an auto transport carrier if necessary. The winning buyer will be responsible for picking up the car or facilitating any necessary shipping arrangements as well as covering all costs associated with an automobile transport carrier. I am happy to provide assistance in loading the car regardless of how the winning bidder chooses to retrieve the car. I would also be willing to deliver this vehicle for an additional cost within a 200 mile radius of my home zip code. I would be willing to negotiate this option as well as discussing associated costs with the winning bidder at the conclusion of this auction. I require a non-refundable $400 PayPal deposit within 48 hours of winning the auction. The remainder of the winning bid purchase price is due in full within 7 days. Acceptable methods of payment to satisfy the remaining bid purchase price of this car would be cash in person, certified bank check or a personal check. Please understand that this car will not be removed from my barn until any type of check (be it a certified bank check or a personal check) has cleared all applicable financial institutions. This vehicle is being sold with no warranty in "As Is/Where Is" condition. Once the car is paid in full, I can store this car for up to 8 weeks from the date of the auction close to allow the winning bidder time to make necessary arrangements to retrieve this car. Please feel free to contact me at 618-521-1461 to make final payment arrangements.
Thank you for your time and consideration reviewing this listing and good luck!!